Purpose
- Colorimetric technique to visualize and semi-quantitatively analyze proteins separated by SDS-PAGE using Coomassie Brilliant Blue dye.
History
- Coomassie originated from a town named Coomassie that was known for using the same dye as a stain for clothes and other textiles in the 19th century. It was not until 1963 that the first publication appeared in public that described the use of Coomassie dye for staining and detecting proteins after electrophoretic separation.
Background: General Principles of Gel Staining
- Once proteins have been separated by electrophoresis, they can be visualized using different methods of in-gel detection each with advantages & disadvantages. Demand for improved sensitivity for small sample sizes and compatibility with downstream applications and detection instrumentation has led to several basic staining methods.
- To make proteins visible, a protein-specific, dye-binding or color-producing chemical reaction can be performed on the proteins within the gel. Depending on the particular chemistry of the stain, various steps are necessary to retain, or fix, the proteins in the gel matrix and to facilitate the necessary chemical reaction.
- Given the common constraints of this format, most staining methods involve some version of the same general incubation steps (figure 1).

- A water wash to remove electrophoresis buffers from the gel matrix
- Acid-alcohol wash to condition/fix the gel to limit diffusion of protein bands from the matrix
- A water wash to remove excess "fix" solution
- Treatment with the staining reagent to allow the dye diffuse into gel and bind to proteins
- Destaining to remove excess dye from the gel matrix background
- There exists numerous methods and variations of detecting proteins on a gel
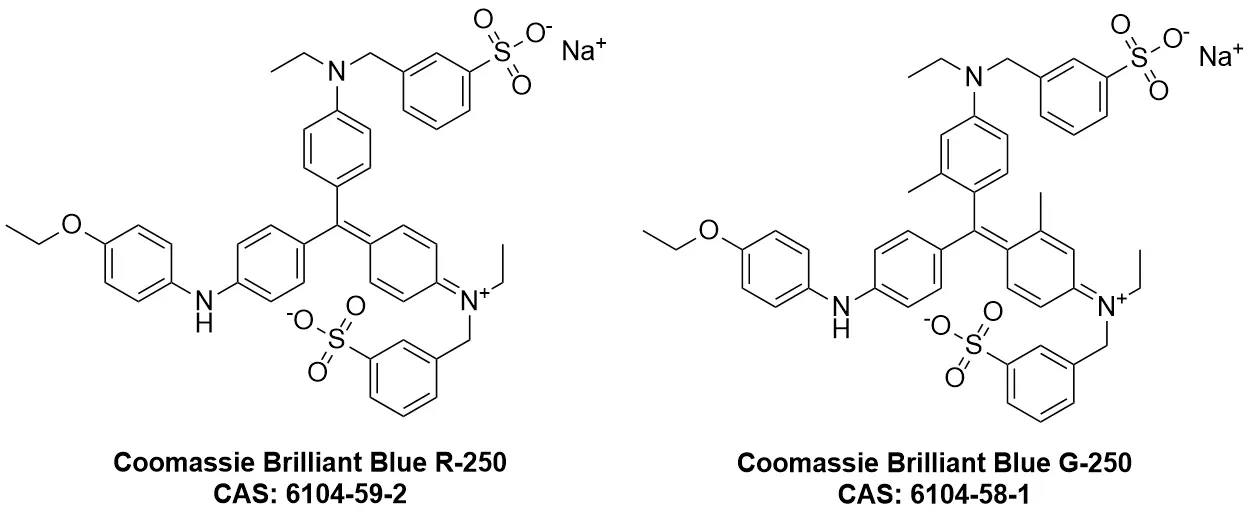
- The most common method of in-gel protein detection is staining with Coomassie dye using either G-250 (colloidal) or the R-250 form of the dye of various formulations to improve the speed and efficiency of staining (figure 2).
Mechanism of Action: Coomassie
- In acidic conditions, Coomassie dye binds to basic and hydrophobic residues of proteins, changing in color from a dull reddish-brown to intense blue (figure 2). As with all staining methods, Coomassie staining detects some proteins better than others, based on the chemistry of action and differences in protein composition. Thus, Coomassie staining can detect as little as 8–10 ng per band for some proteins and 25 ng per band for most proteins.
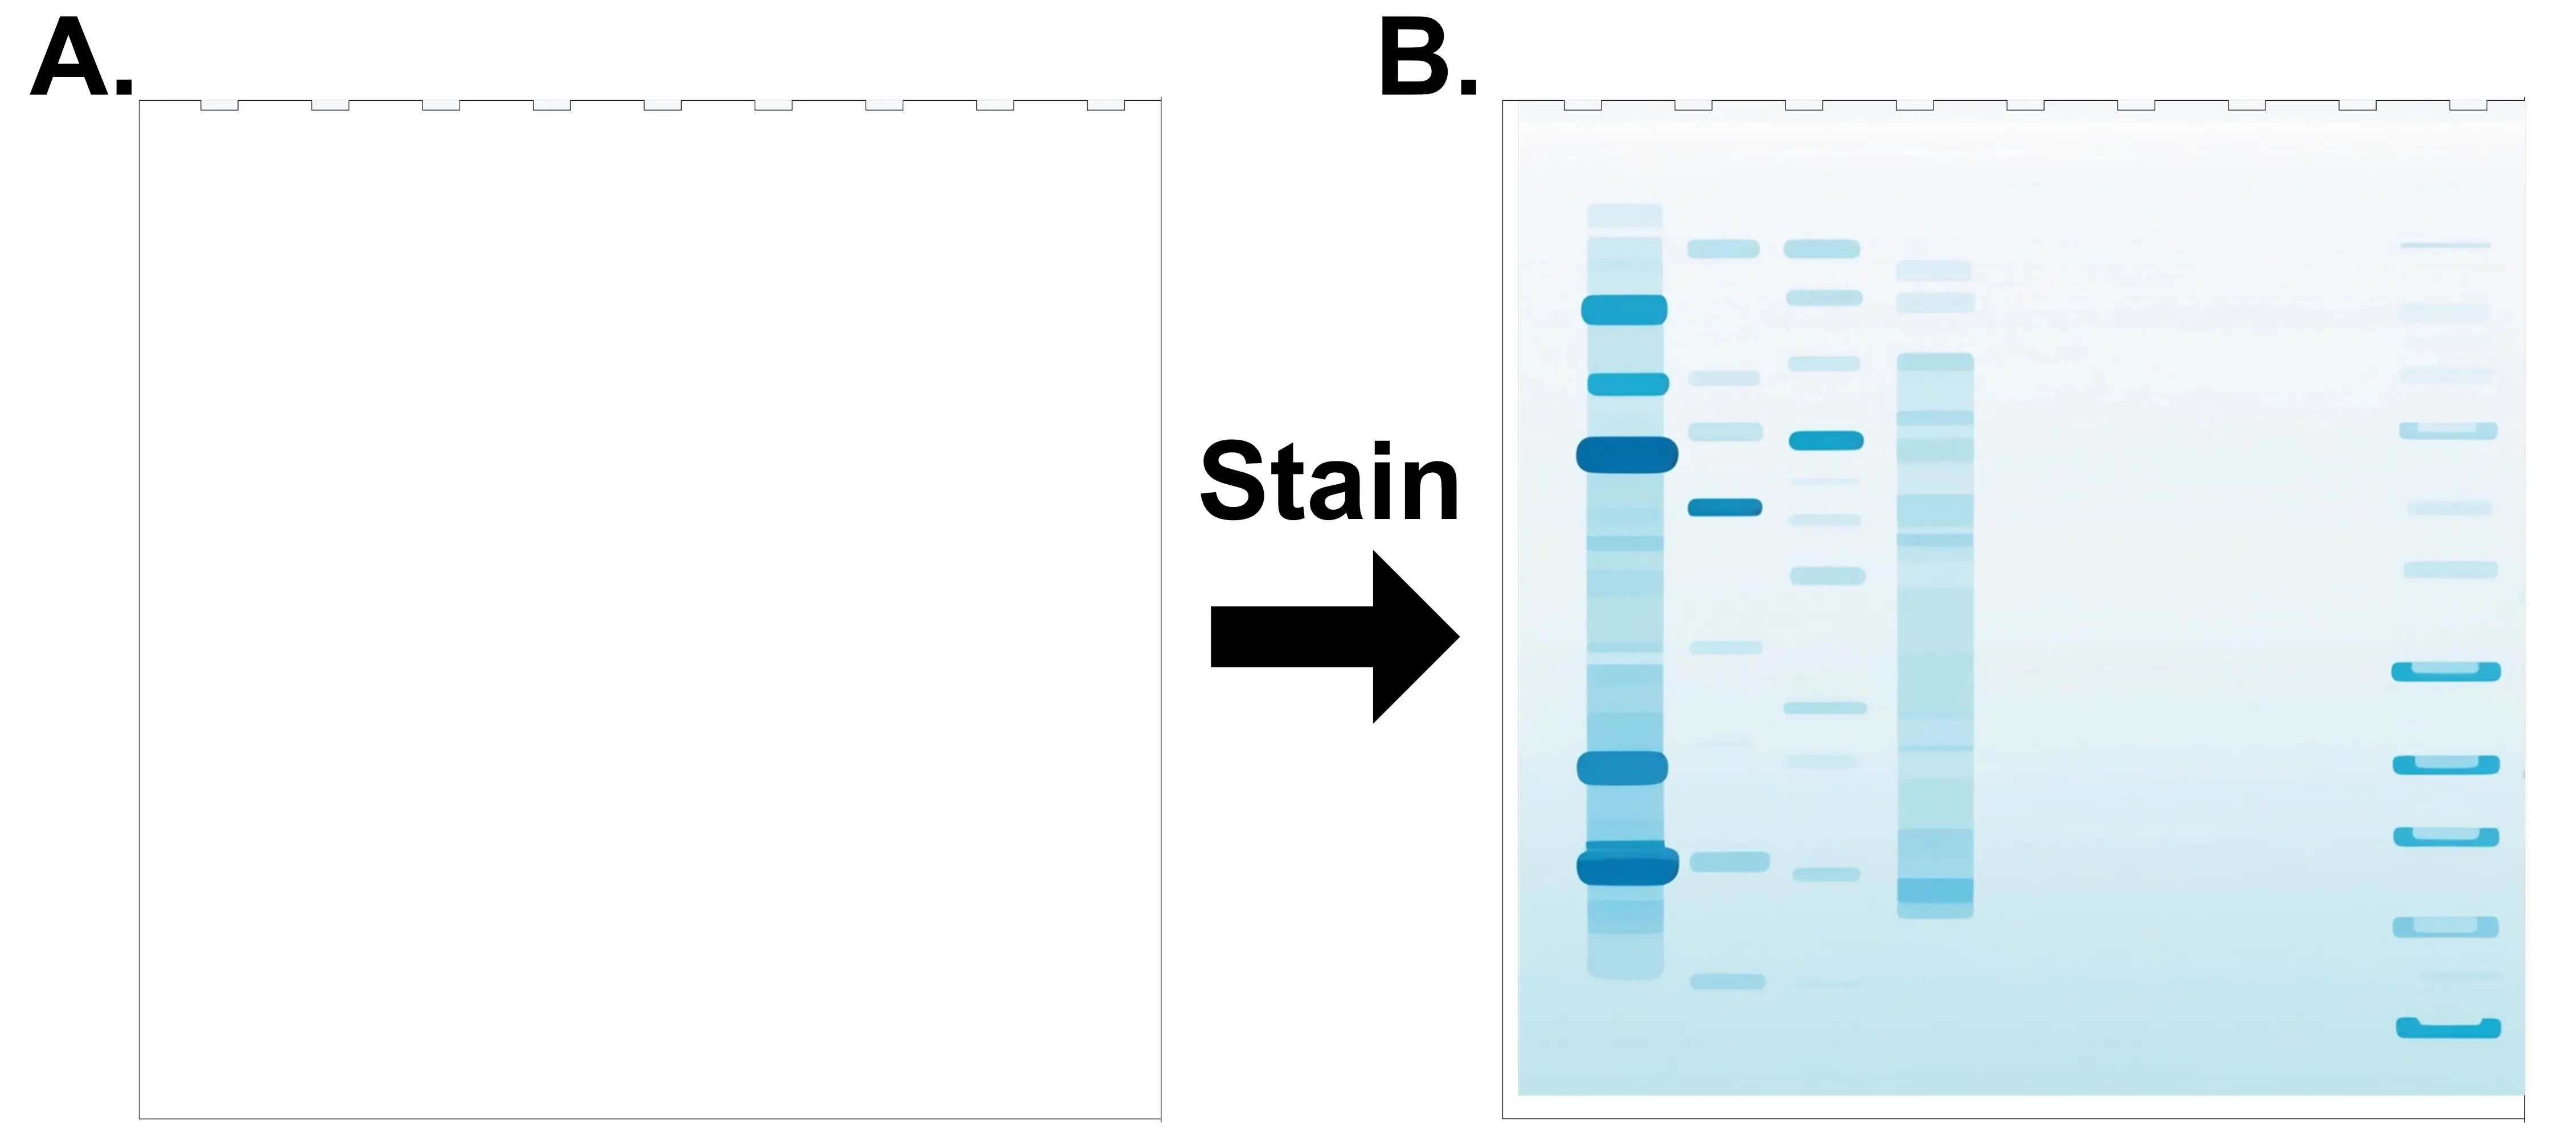
- Coomassie dye staining is especially convenient because it involves a single ready-to-use reagent and does not permanently chemically modify the target proteins.
- An initial water wash step is necessary to remove residual SDS, which interferes with dye binding. Then, the staining reagent is added, usually for about 1 hour; finally, a water or simple methanol: acetic acid destaining step is used to wash away excess unbound dye from the gel matrix. Because no chemical modification occurs, excised protein bands can be completely destained and the proteins recovered for analysis by mass spectrometry or sequencing.1
Gel Staining: Coomassie brilliant blue
- Coomassie brilliant blue is the name of two similar triphenylmethane dyes that are commonly used for staining proteins in analytical biochemistry2
- Coomassie brilliant blue G-250 has 2 methyls differing from Coomassie brilliant blue R-250
- The suffix "R" in the name of Coomassie brilliant blue R-250 is an abbreviation for "red" as blue color of dye has a slight reddish tint
- The "G" variant the blue color has a more greenish tint. The "250" denotes purity of dye
- The color of the two dyes depends on the acidity of the solution and different charged states of the dye
- In the red form, all three nitrogen atoms carry a positive charge
- The green color corresponds to a form of the dye with no net overall charge
- Coomassie blue dye molecule is an anion with an overall charge of −1
- Coomassie dye interacts noncovalent electrostatic interactions with the amino and carboxyl groups of proteins. The formation of the complex stabilizes the negatively charged anionic form of the dye, producing the blue coloration causes a shift in the absorbance maximum of the dye from 465 to 595 nm. The increase of absorption at 595 nm is monitored to determine protein concentration
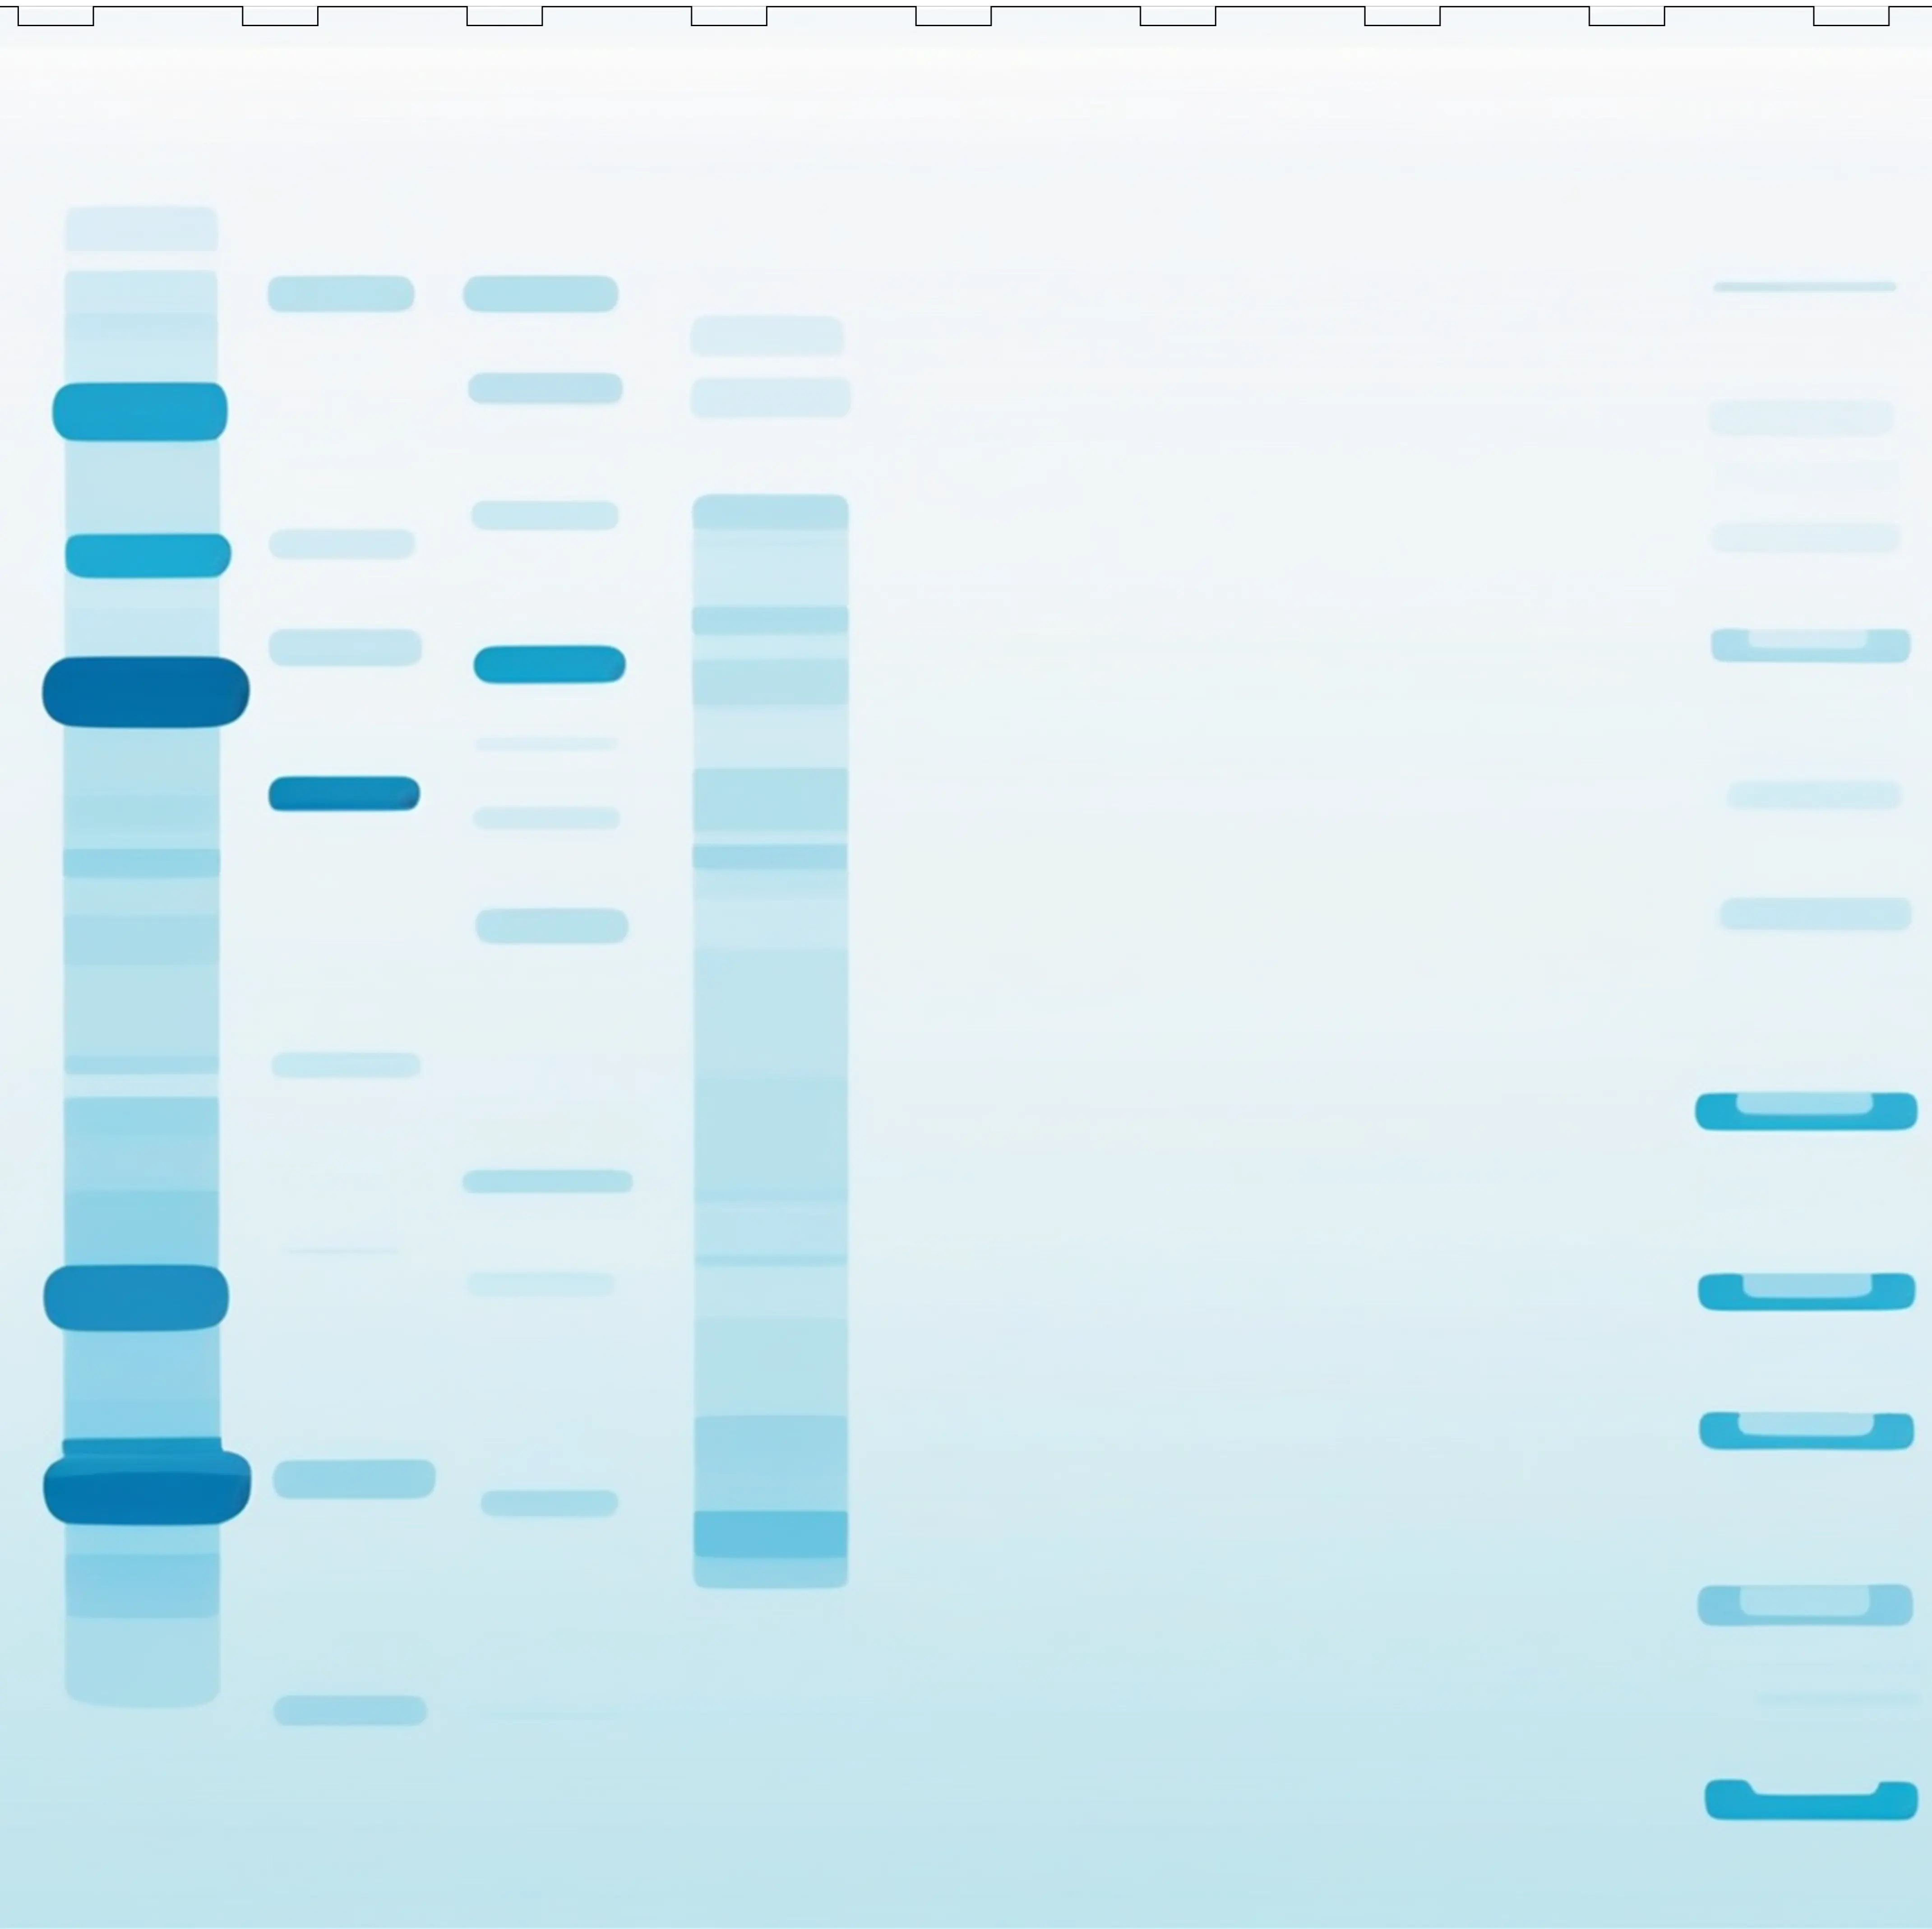
- Coomassie staining of resulting protein gels from electorphoresis
- The Bradford assay uses the spectral properties of Coomassie brilliant blue G-250 to estimate the amount of protein in a solution. A protein sample is added to a solution of the dye in phosphoric acid and ethanol.
- Under the acid conditions the dye is normally a brownish color but on binding to the protein the blue form of the dye is produced.
- The optical absorbance of the solution is measured at a wavelength of 595 nm However, among the disadvantages of the method is its variability of color development with different proteins: the absorbance change per unit mass of proteins varies with the type of the protein.2
Materials Coomassie G-250 or R-250: Slow Method
- Gel Staining Coomassie brilliant blue: Mix 40% Methanol (or Ethanol), 10% Acetic Acid, 0.1% Coomassie Brilliant Blue R-250 and dilute to appropriate volumes of DI water. Stir overnight3
- The solution should be deep blue before adding the gel
- After overnight stirring, filter the solution through Whatman #1 filter paper. This removes precipitate to prevent background staining artifacts
- Destaining solution (45% methanol or ethanol, 45% DI water, 10% mL acetic acid)
- Mini gel pads (Qty:15ea, 8 sheets per pad)
- Contrast Imager Tray
- Plastic trays of size slightly bigger than the gel
- Serological pipette and serological pipette controller
- Orbital shaker
- Experimental gel and control gel (for comparison)
Example Protocol Coomassie Slow Method
- Fixation: If the gel has not been pre-fixed, submerge the gel in 50% Methanol / 10% Acetic Acid for 30 minutes with gentle shaking.3
- Staining: Submerge the fixed gel in the Coomassie Staining Solution. Ensure the gel is fully covered and agitate gently (e.g., on an orbital shaker).
- Incubation: Allow staining to proceed for 1 hour at room temperature or overnight at 4°C for maximum sensitivity.
- Destaining: Remove the staining solution and replace with Destaining Solution (40% Methanol, 10% Acetic Acid).
- Agitation: Shake the gel until the background is clear and protein bands are distinct blue. This typically takes 2–6 hours, changing the destain solution every hour.
Materials Coomassie R-250: Rapid/Fast Method Mini Gels
- Thermo Scientific Pierce Power Station
- Power Stain Cassette
- Coomassie brilliant blue stain (contains methanol, acetic acid and Coomassie R-250 dye)
- Destaining solution (contains methanol or ethanol and acetic acid)
- Mini gel pads (Qty:15ea, 8 sheets per pad)
- Contrast Imager Tray
- Plastic trays of size slightly bigger than the gel
- Serological pipette and serological pipette controller
- Experimental gel and control gel (for comparison)
Example Protocol Coomassie R-250 Rapid/Fast Method Mini Gels
The fast method typically requires 15 minutes or less total time.
- After electrophoresing the proteins in polyacrylamide mini gel(s), remove the gel from the cassette
- With a spatula, carefully transfer the gel in a tray of DI water to soak, wash and remove the residual running buffer
- Put an 8-sheet mini gel pad on a separate plastic tray, remove the blue top pad to reveal the white layer
- Use a serological pipette controller with pipette to thoroughly soak pad with Power Stain
- Requires approximately 15 mL of Power Stain
- Put an 8-sheet mini gel pad on a second plastic tray, then remove the blue top pad to reveal the white layer
- Use a serological pipette controller with pipette to thoroughly soak the second pad with destain solution
- Requires approximately 15 mL of destain solution
- Put the destain-soaked pad on the white-half of Power Stain Cassette
- Put the gel on top of the destain-soaked pad
- Put power stain-soaked pad on top of the gel
- After this step, the gel is sandwiched between destained & stained pads
- Use a clean roller to smoothen the pad
- Close the cassette and insert it into the Power Station
- In the Power Station settings, go to mini gel and 6-minute, press start
- The resulting gel will show contrasting protein bands against blue/purple background
- With a spatula, carefully transfer the stained gel onto DI water filled tray
- Image the gel: transfer gel directly on an UV Contrast Tray and place the tray inside an imager’s quartz glass
- Image using imaging mode: Protein Visible Mode
- Repeat steps 1 – 15 for each gel
Commentary
Special Considerations
- Time: Fast Method of Coomassie Staining achieves results in less than 15 minutes total time with identical sensitivity as overnight staining methods
- Sensitivity: Standard Coomassie staining detects approximately 3 - 200 ng of protein per band
- Quantitation: While primarily qualitative, the intensity of the blue bands correlates linearly with protein mass within a specific range, allowing for semi-quantitative analysis.
- Drying: For permanent archival storage, gels can be dried onto filter paper using a gel dryer or vacuum drying apparatus.
- Downstream workflow: The resulting stained protein gel is compatible for MS analysis
- Specifications
| Criteria | Protein |
|---|---|
| Sensitivity | 100 – 500 ng (approximate) |
| Selectivity | N/A |
| Detection Method | Visual |
| Auxiliary Criteria | Estimated Value |
|---|---|
| Speed | Fast (15 minutes) or Slow (overnight) |
| Ease and convenience | Easy |
| Operator skill | Low |
| Cost | Low |
| Selectivity | N/A |
Advantages
- Simplicity: Requires no specialized equipment beyond standard lab glassware, imager and shaker
- Cost: Reagents are inexpensive and stable for long-term storage.
- Compatibility: Compatible with downstream applications like Mass Spectrometry (MS) if modified protocols (e.g., MS-compatible dyes) are used
- Wide range of protein compatibility: Including soluble and membrane-bound proteins
- Sensitivity: detectable down to the lowest 3 ng dependent on the formulation and incubation times
Limitations
- Dynamic Range: Limited linear dynamic range compared to fluorescent stains.
- Detergent Interference: High concentrations of SDS or other detergents can interfere with staining and destaining, requiring extended wash times.
- Alternatives: Silver Stain and Fluorescent stain. Silver Stain results in higher protein sensitivity at the expense of more time-consuming. Fluorescent stain results in higher protein sensitivity at the expense of more time and cost.
Critical Steps: What to Look For
- Background: A clean background should be white/clear. Yellowish background indicates insufficient acetic acid or fixation.
- Bands: Bands should appear sharp and distinct blue. Fuzzy bands may indicate overloading or incomplete separation.
- For the slow method, staining for longer time e.g. 2 hours along with increasing wash time to overnight will greatly improve the sensitivity of the Coomassie stain i.e. you will be able to observe more protein bands
Applications
- Quality control of protein purification steps (protein purity check)
- Verifying expression levels in recombinant protein studies
- With an included protein ladder of known size (kDa), the stained protein gel may be used as evidence of a protein of interest
- Checking sample integrity before Western Blotting or Mass Spectrometry
Comparison with Other Staining Methods
An alternative to Coomassie is Silver Staining, which offers significantly higher sensitivity (100x more sensitive) but involves toxic reagents (formaldehyde, glutaraldehyde) and has a more complex protocol. Another alternative is Fluorescent Stains (e.g., SYPRO Ruby), which offer wide dynamic ranges and compatibility with digital imaging.
Commercial Products: all-in-one kits
Coomassie Brilliant Blue R-250 Staining Solutions Kit (1610435)4
- Contains 1 liter Coomassie Brilliant R-250 staining solution and 2 x 1 liter destaining solution
Pierce™ Mini Gel Power Staining Kit (22840)5
- Contains materials for 30 mini-sized gels at 15 mL reagent each use
- Materials include 480 mL Coomassie dye, 480 mL destaining solution and 60 pads (8 sheets per pad)
Thermo Fisher: SimplyBlue™ SafeStain (LC6065)6
- Coomassie-stain free of hazardous chemicals.
- Pre-mixed solution; no methanol or acetic acid required. Stains in 30 minutes with minimal background.
Compatibility Table
| Substance | Effect on Coomassie Staining |
|---|---|
| SDS (Sodium Dodecyl Sulfate) | High concentrations inhibit staining; requires extensive destaining. |
| DTT / β-Mercaptoethanol | Generally compatible, but high concentrations may cause background haze. |
| Urea | Compatible; often used in 2D gels. May require longer destaining. |
| Tris Buffer | Compatible. |
| Glycine | Compatible. |
| EDTA | Compatible. |
| PMSF | Compatible. |
| Detergents (Non-Ionic) | |
| Triton X-100 | Low concentrations |
| Tween 20 | Generally compatible at low %. |
| Detergents (Zwitterionic) | |
| CHAPS | Compatible. |
| Fixatives | |
| Methanol | Required for standard staining. |
| Acetic Acid | Required for standard staining. |
| Formic Acid | Can be used for fixation; compatible with stain. |
References
- Sasse, J.; Gallagher, S. R. Staining Proteins in Gels. Current Protocols in Molecular Biology 2009, 85 (1), 10.16.11-10.16.27.
- Brunelle, J. L.; Green, R. Chapter Thirteen - Coomassie Blue Staining. In Methods in Enzymology, Lorsch, J. Ed.; Vol. 541; Academic Press, 2014; pp 161-167.
- Arndt, C.; Koristka, S.; Feldmann, A.; Bartsch, H.; Bachmann, M. Coomassie-Brilliant Blue Staining of Polyacrylamide Gels. In Protein Electrophoresis: Methods and Protocols, Kurien, B. T., Scofield, R. H. Eds.; Humana Press, 2012; pp 465-469.
- Coomassie Brilliant Blue R-250 Staining Solutions Kit #1610435. Bio-Rad, https://www.bio-rad.com/en-us/sku/1610435-coomassie-brilliant-blue-r-250-staining-solutions-kit?ID=1610435 (accessed 31 May 2026).
- Pierce™ Mini Gel Power Staining Kit. ThermoFisher Scientific, https://www.thermofisher.com/order/catalog/product/22840?SID=srch-srp-22840 (accessed 31 May 2026).
- SimplyBlue™ SafeStain. ThermoFisher Scientific, https://www.thermofisher.com/order/catalog/product/LC6065 (accessed 31 May 2026).